


Lighting Around Glass Pool Fencing: Ideas, Safety and Design Considerations
July 20, 2026

Lighting plays an important role in the safety, usability and appearance of outdoor pool areas, particularly when paired with glass pool fencing in Newcastle. Well-planned lighting can improve visibility, define pathways and complement the clean appearance of glass panels. Poorly positioned fittings, however, may create glare, distracting reflections and shadowed areas around gates, steps and pool edges.
Lake Macquarie Fencing understands that lighting and fencing layouts need to work together. By considering sightlines, gate access, non-climbable zones and future electrical requirements early, homeowners can create a pool area that remains safe, practical and visually appealing after dark.
This article explores lighting ideas for frameless and semi-frameless glass pool fencing, including ways to improve nighttime visibility, reduce glare and avoid overlighting. It also explains the safety, electrical and maintenance considerations to review before finalising the layout.
Glass pool fencing responds differently to light than timber, metal or masonry barriers. Clear panels allow light to pass through, but they can also reflect nearby fixtures, pool lights, windows and surrounding surfaces.
At night, light may:
The position and direction of each fitting determine whether the glass remains visually clear or produces distracting reflections. Lighting should therefore be planned around the viewing angles from the house, alfresco area, pathways and other common supervision points.
Fixtures positioned below eye level and directed towards the ground usually create fewer reflections than bright lights aimed directly at the glass. The goal is not to illuminate every panel, but to make gates, steps, pathways and changes in level easy to identify.
The most effective pool-area lighting plans use several subtle sources rather than relying on one bright floodlight. Layered lighting allows different parts of the pool area to be illuminated according to their purpose.
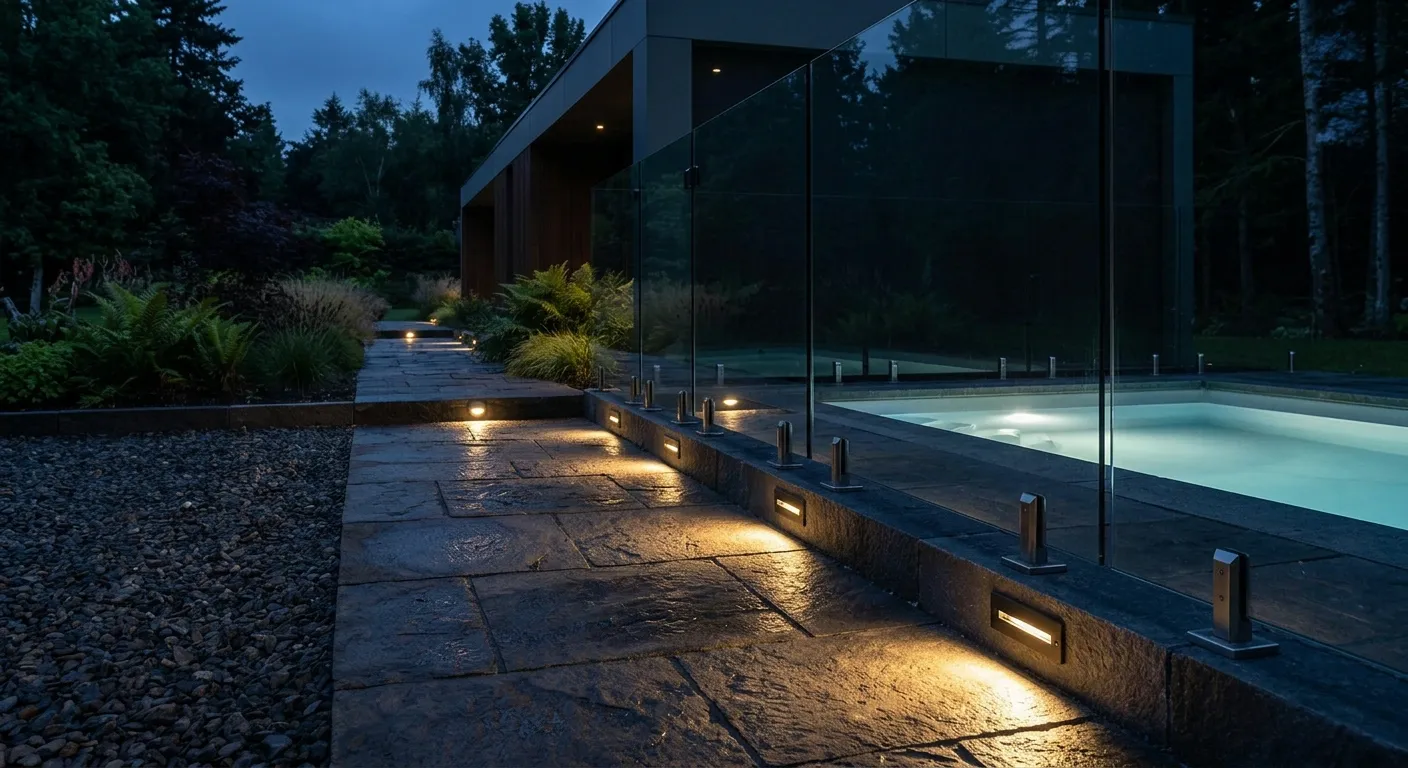
Small recessed fittings can be installed in steps, paving or decking to define walking routes and changes in level. When directed across the ground rather than towards the glass, they can improve visibility without creating harsh reflections.
Ground lights may also be used near the fence line to provide a visual guide. Their spacing, output and beam angle should be selected according to the layout and the manufacturer’s specifications rather than following a fixed distance for every project.
Where fittings are installed in locations exposed to rain, splashing or temporary water collection, a licensed electrician should confirm that their construction and Ingress Protection rating are suitable for the installation.
Low bollards or shielded spike lights can illuminate paths and garden beds beside the pool enclosure. They are particularly useful where recessed fittings cannot be installed in existing paving or decking.
The light source should be concealed or directed downwards so it does not shine into the eyes of swimmers, people seated nearby or anyone looking through the glass from the house.
Garden lights should also be positioned so they do not create climbable objects near the outside of the pool barrier.
Lighting can often be incorporated into nearby structures without attaching fittings directly to the glass fence. Suitable locations may include:
LED strips concealed beneath seating, coping or wall capping can create a soft wash of light across paving. Wall-mounted fittings with shields or louvres can also direct light downwards while keeping the light source hidden from common viewing angles.
Keeping lighting separate from the glass barrier generally makes maintenance easier and reduces the risk of fittings, brackets or conduits interfering with fence compliance.
Pool gates and access paths need consistent lighting so users can clearly see the entrance, latch area and surrounding paving.
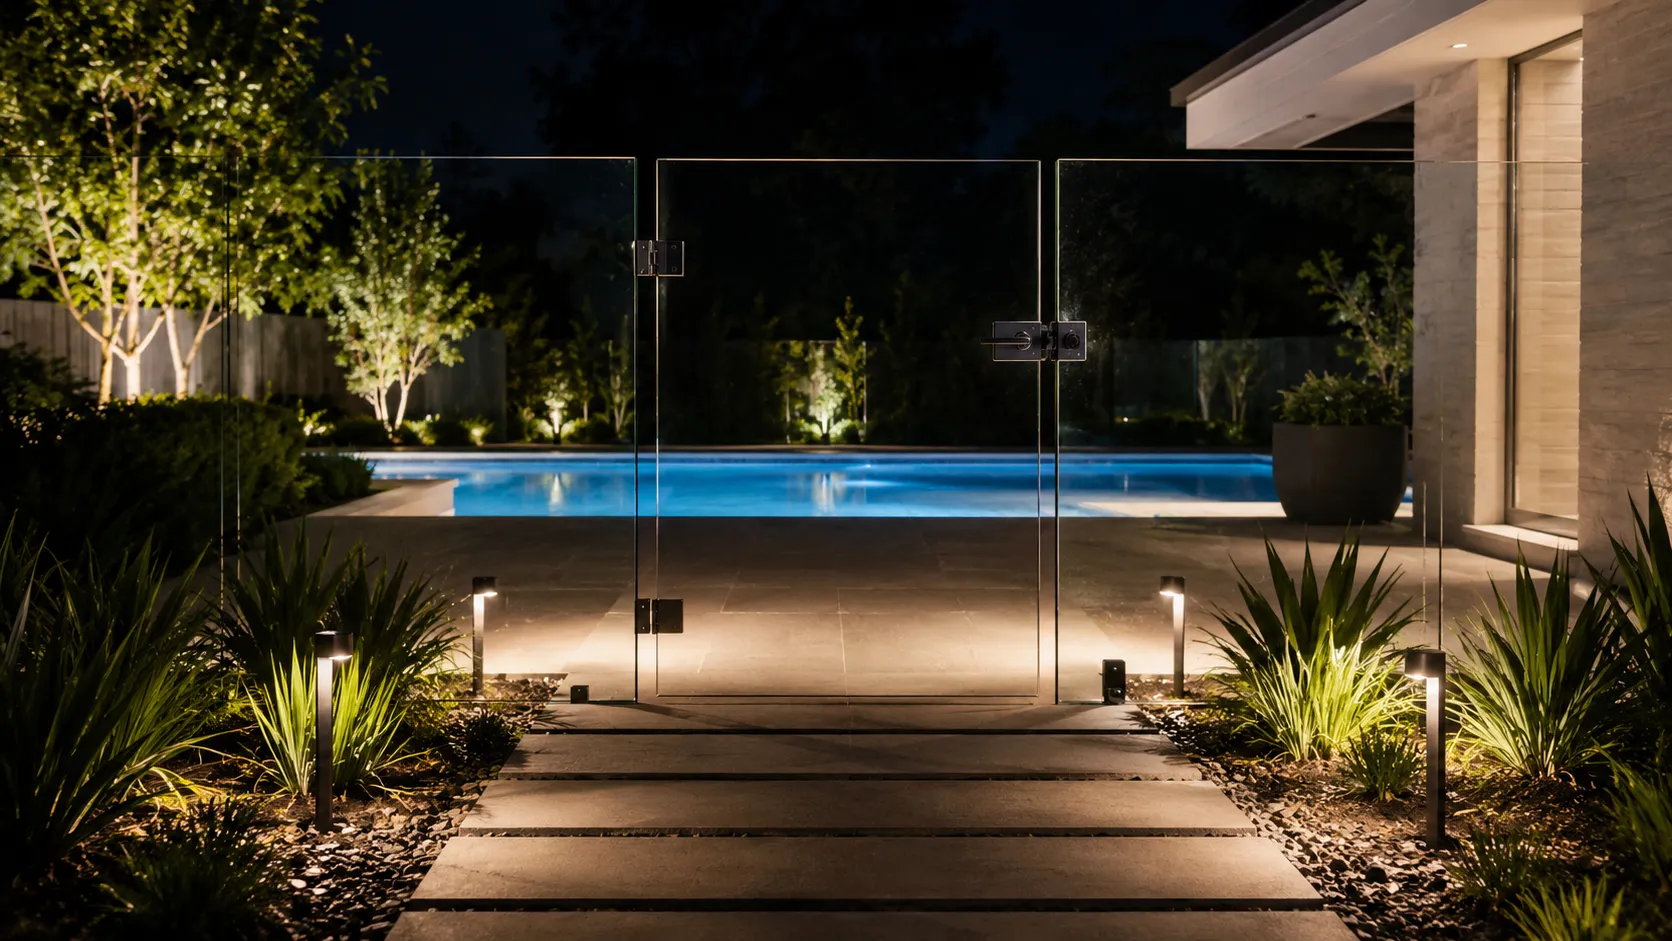
Rather than obscuring sections of glass, gate visibility can be improved through:
Any marker, fitting or accessory added near the barrier should be assessed to ensure it does not create a foothold or affect gate operation.
Glare occurs when a bright light source or reflection reduces visual comfort or makes it harder to see important details. Around a pool, excessive glare can obscure steps, edges and swimmers, particularly when the surrounding area is otherwise dark.
Spotlights and narrow-beam fittings aimed directly at large glass panels are more likely to produce bright reflections. A better approach is to illuminate the ground, nearby landscaping or surrounding structures.
Lights should generally be directed:
Testing the lighting from different locations before permanently installing the fittings can help identify problematic angles.
Pool water can reflect both sunlight and artificial light onto the glass. Moving water may create flickering patterns that look attractive but can become distracting when combined with bright fittings or highly reflective paving.
Pale, glossy or polished surfaces may increase the amount of reflected light around the pool. Matt or textured finishes often create softer reflections, although slip resistance, maintenance and suitability for wet areas should remain the primary considerations when selecting pool surrounds.
Underwater lights can produce visible circles or reflections on the glass, especially when mounted high on the pool wall or aimed horizontally.
Their location and direction should be considered as part of the overall lighting plan. Depending on the pool design, positioning the fittings lower or directing the beam towards the pool floor may reduce reflections at eye level.
Pool lighting design and installation should always be completed in accordance with the product requirements and applicable electrical rules.
Clear, tinted and low-iron glass have different visual characteristics, but glass selection alone should not be relied on to control glare.
Low-iron glass is mainly chosen for its clearer appearance and reduced green tint. Tinted glass can produce a darker visual boundary, but it may also affect views through the fence. Specialist surface treatments may be available for particular applications, although their suitability for pool fencing should be confirmed with the glass supplier.
In most residential settings, fixture position, direction and brightness have a greater effect on glare than the glass type itself.
Dust, water spots, salt residue and fingerprints scatter light and may create a hazy appearance at night. Regular cleaning helps maintain clear sightlines and makes reflections more predictable.
In coastal and lakeside environments, glass, fittings and hardware may require more frequent cleaning because of moisture, salt and airborne residue.
Lighting near a swimming pool must be planned carefully because water, wet surfaces, metal components and bare feet increase electrical risks.
Fixed wiring, transformers, switches and fittings should only be installed or modified by a licensed electrician. The electrician should assess the proposed location in relation to the pool and determine the appropriate voltage, clearances, protection and product ratings.
Pool areas are divided into electrical zones that affect which equipment may be installed and where it can be positioned. The requirements become stricter closer to the water.
Fittings exposed to rain or splashing need an appropriate IP rating, while products installed in paving or areas where water may temporarily collect may require a higher level of protection. The correct rating depends on the exact location and installation method, so it should be confirmed for each fitting rather than assumed.
Extra-low-voltage systems are commonly used for landscape, step and ground lighting near pools. However, using a low-voltage product does not remove the need for compliant wiring, suitable equipment and professional installation.
Transformers, drivers and electrical connections should be positioned in appropriate dry and ventilated locations outside restricted pool zones.
Pool-related electrical circuits require suitable protection, including residual current devices where required. RCDs, junctions, fittings and seals should be inspected and tested periodically, particularly in coastal or exposed environments where corrosion can develop more quickly.
Switches and controls should be positioned where they can be operated safely. Weather-resistant controls, timers, motion sensors and smart systems may be suitable, provided they are correctly rated and professionally installed.
A manual override can also be useful so the pool area can be illuminated immediately when required.
More lighting does not necessarily make a pool area safer. Excessive brightness can wash out the appearance of the water, increase glare on the glass and create strong contrast between lit and unlit areas.
A balanced plan begins by identifying where lighting is genuinely needed.
Priority areas generally include:
Once these areas are safely illuminated, softer accent lighting can be added to highlight planting, walls or architectural features.
Fixture output should be chosen according to the size of the space, mounting position, beam angle and surrounding finishes. A small number of well-positioned fittings will often perform better than numerous bright lights.
Floodlights and high-output spotlights should be used carefully and directed away from the glass, water, neighbouring properties and common viewing positions.
Warm white lighting generally creates a softer atmosphere around residential pools and may appear less harsh on glass than cooler blue-toned light. The colour temperature should also work with the home’s exterior lighting, landscaping and pool finish.
Consistency is important. Mixing several noticeably different colour temperatures can make the pool area appear visually disjointed.
Separate controls allow homeowners to adjust the lighting according to the activity. For example, pathway and gate lighting may remain on for safety while decorative garden or entertaining lights can be dimmed or switched off.
Timers, dimmers, sensors and smart controls can also reduce unnecessary light spill and prevent the pool area from remaining brightly lit throughout the night.
Lighting and fencing should be coordinated before glass panels are ordered, paving is completed or electrical conduits are permanently installed. Early planning can prevent expensive alterations and help preserve supervision sightlines.
Lighting must not compromise the pool fence or create new climbable features.
Before finalising the layout, confirm that:
Pool fencing must comply independently of the lighting. Lighting can improve visibility, but it does not make a non-compliant barrier safe or compliant.
Property owners may also need to obtain a valid pool compliance certificate after the barrier has been inspected and confirmed to meet the applicable safety requirements.
Temporary lights can be used to test the design before fittings are permanently installed. Walk around the area after dark and check the view from the house, alfresco area, deck and other supervision points.
Confirm that:
The layout should also accommodate cleaning, furniture placement, gardening and future repairs.
Check that:
Coordinating these details early creates a cleaner finish and reduces the likelihood of modifications after the fencing and paving have been completed.
Lighting can improve the safety, usability and appearance of a glass-fenced pool area when it is planned carefully. Low-level fixtures, indirect illumination, clear pathways and controlled brightness help reduce glare while preserving views through the glass.
The lighting design must also avoid interfering with gate operation, non-climbable zones and other pool-barrier requirements. Electrical equipment should be selected and installed by a licensed electrician in accordance with the applicable standards and the conditions around the pool.
Lake Macquarie Fencing can help homeowners plan a glass pool fencing layout that supports clear sightlines, practical access and coordination with surrounding landscaping and lighting. By considering these elements before installation, the finished pool area can feel safer, more cohesive and more enjoyable to use after dark.